
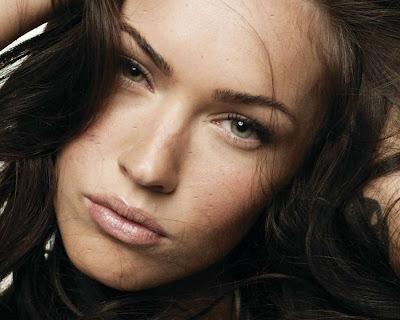
Photography Inspiration
Photographers’ portfolio sites are probably the most simple and plain out of all the genres. While I see very little innovation with respect to “design,” it works and it works well. The photos themselves do all the talking.
Photography is an art, and art needs passion. With passion, there’s learning. These outstanding Photographers are able to “wow!” us because they learn photography by heart. They have passion for the art and through learning they combine all the elements to a degree of perfection!
So much of today advertising is missing the conceptual element. It’s all so dry and straightforward, void of spirit, soul, and sex appeal.
But I think we’re quickly headed back toward conceptual advertising – photography with an inherent friction and message, with a headline that adds a surprise third element. It’s an easy way to shine through the dull and go past the dim.
Concepts behind photographs always amazes me. I’m a commercial photographer this makes me smile to see you post this.
 |
| Girl Wear Sun glasses |
 |
| Awesome Eyes |
 |
| Angel Girl |
 |
| Beautiful Baby |
 |
| Land Scape |
 |
| Socialite Boy |
 |
| Boys Eyes |
 |
| In Desert |
 |
| Kurta Shalwar Concept |
 |
| Hairs And Coat |
 |
| New Hair Style |
 |
| Stylish Kid |
 |
| New Design Of Sun Glasses |
 |
| Portrait Photography |
 |
| Land Scape Mode |
 |
| Beautiful Girl |
 |
| Car |
 |
| Cute Kids |
Portrait Expert Skills Use In Portrait Editing
Do You Find Difference Between These Two Picture Who Looks Better After Or Before Obviously After looks better then before.
What I Do In It:-
First of all i just change the picture quality using HDR action i download this action from google
then i use that beautiful action then i increase levels of picture which make her eye and skin beautiful
then i do some changes with curves i increase the redness and greeness of this picture then i found the embodiment of beauty in it but it still to good what i want then change brightness and contrast of the picture then by doing some change in her nose and make her small with liqufiy tool then change her eye color and lips color using brush tool then you will see real embodiment i call that magnificent.
Justify yourself:
Every point, color, lips and eyes, hairs, even every then i this picture should have a reason to be in your piece; if it doesn’t, strike it. Be harsh if a picture or phrase does not add value to your editing, get rid of it.
You could improve your editing by being more focused about photoshop.There is not much brain squeezing needed for as long as you are in the right mindset to edit.If you have a lot of problems going on in your life and everything seems bothering for you, it would be difficult for you to be inspired and edit down wonderful things. That is why when you decide to edit you have to neglect first relationship problems in real life.
I do a lot of freelance editing and have to say that 9 times out of 10 editor turn in too much v. too little. It's gotten to the point where I'm tempted to offer some kind of portrait editing for how much they should allot for each story section, i.e., for a 1,000-editing feature 200 to 250 for the lead, intro and nut graph; 500 to 600 for the body of the story in which they could spend a paragraph or two on each relevant point or example; and the remaining 100 to 150 edits for a conclusion. Harsh as that kind of outline sounds, it would definitely help some editors who left to their own devices would take 400 to 500 editing on a set up and then have no room left for the details that really make the story.
The only other admonition I'd add to our list is: Use quotes sparingly. If the editor can summarize what a source said in far fewer words they should, and save direct quotes for absolutely positively necessary or the really, really good stuff.
Suggestion :-
For better editing I would suggest to use simple brushes color effects with a lot of action, curves and doing changes in eyes.You must touch the soul of others and his/her curiosity. After that they're all yours.
 |
| Portrait Expert Skills Use In Portrait Editing |
 |
| Before Portrait Editing |

After Portrait Editing Skills
Best portrait Editing Tips And Tricks
 |
| Unedit Picture |
Do Some Change In This Picture Like Use Clone Stamp To Remove Some Spots On Her Face.
Then An Important Thing You Gonna Do In This Picture Is To Make It Bright Lil Bit Contrast Also Then Go to Levels Improve Level Of This Picture Then Make Her face Soft Improve The Levels Of Her Eyes Make Her Beautiful Baby Girl Now The Editing Is Finish.
I got this picture by doing some change in it.Enjoy :D
 |
| How To Edit Portraits Pictures |
Image Formation
Image Formation By A Plane Mirror:
The formation of image by a plane mirror is due to the fact that says traveling
from on object to our eye change their direction after reflection so that they
appear to come from point other than those from which they really started.
Explanation:
Suppose light rays coming from luminous object 'o' are reflected by the plane mirror 'M' and
enter our eye.The line which joins the image 'I' and the object 'o' makes an angle
of 90' with the surface of the mirror 'M' from the geometrical construction, the
distance 'OM'and 'IM' are equal, therefore we feel that the light rays come from 'I'
but in fact they come from 'o' and are reflected by the mirror.At the mirror surface,
we find that the angle of incidence is equal to the angle of reflection.
Characteristics Of The Images Formed By A Plane Mirror:
Images are laterally inverted (Right side appear as left).
Images are of same size as the object.
Images are virtual (Can't be obtained on a screen).
Useful Things
How To Choose Lens
A lens is a piece of transparent material that refracts light in regular
way.It is bounded by one or two spherical surfaces.There are two main types of
spherical lens.
1. Convex lens
2. Concave lens
Convex Lens
A lens which is thick at the center and thin at the edges is called
a convex lens.It converges parallel beam of light at a point and hence is also
called a converging lens.
There are three types of convex lens :
Double Convex Lens :-
Both The Surfaces of this lens are convex.Plano-Convex Lens :-
One of the two surfaces of this lens is plane and other is
convex.
Concave-Convex Lens :-
One of the two surfaces of this lens is concave andother is convex.
Concave Lens
A lens which is thinner at the center and thicker at the edges is
called a concave lens.It diverges a parallel beam of light, hence it is also
called A Diverging lens.
There Are Three Types Of Concave Lens :
Double Concave lens
Both the surfaces of this lens are concave.Plano-Concave lens
One of the two surface of this lens is plane and other isconcave.
Convex concave lens
On of the two surfaces of this lens is convex andthe other is concave.
Now You Are Able To Select lens !
Now People Ask Me What Is Aperture Okay
Actually Aperture Is the Diameter of lens is called aperture of lens.
Optical Center :
The Geometric Center Of A Lens Is Called The Optical Center.
Power Of A Lens :-
The Reciprocal of focal length of a lens is called power of alens.The positive and that of concave lens is supposed to be negative.
Difference Between Compound Microscope And Simple Microscope
Compound Microscope :
Introduction
It is an optical instrument by which a small object can be seen verymuch magnified.
Construction :
It consists of two convex lenses fitted at ends of two tubes.One
of these two tube can move into the other to change the distance between the
lenses.The lens near the object has short focal length and it is called objective,
whereas; the lens near the eye has large focal length and it is called eye piece.
There is a mirror at the base which reflects light on object.
Working
1.The Object Is Placed Between 2f and f of the objective lens.
2.The objective lens produce a real inverted and magnified image beyond 2f.
3.This image comes within the focal length of the eye piece.
4.The eye piece acts as magnifying glass, producing a very enlarge image
which is virtual.
Simple Microscope :
A simple microscope (magnifying glass) is simply a single
biconvex (converging lens of a short focal length.
The object to be seen as magnified is placed within the focal length of the lens.
This produces an enlarged, virtual and erect image towards the object itself.
Magnification Of Simple Microscope :
The magnification of a simple microscope is determine by;
M=1+ d/f
Where 'f' is the focal length of the lens and 'd' is te near point distance
of the object which is about 25cm for the normal eye.
Human eye
Human eye is an organ of visual perception in human being.
Parts of Human Eye :
The eye ball is spherical in shape with a diameter of about 2.5cm.It consists of the
1.Sclera:
It is the outer most layer of eye.It is thick and opaque and impermeable
Cornea:
It is the front part of sclera.It is transparent and allows the light
Choroid:
It is the pigmented middle layer of eye.It forms a colored curtain
Iris
It is the colored curtain which is muscular and acts for varying the diameter
Pupil
The central hole or aperture of the iris is called pupil.it automatically
Convex lens
Ciliary Muscles :
Retina : It is the third layer inside.The choroid.The rays of light form
and object are focused and converged by the lens on retina.
Optical Nerves
They carry impression to the brain.
Aqueous Humour
Vitreous Humour
It is a transparent jlly like liquid filled between lens and retina.
Defects Of Eye :
Following are the main defects of eye :
Short Sightedness (Myopia)
Defects :
If a persons cannot see distance object but can see near objects then he
Cause :
The eyeball is too converging or too long as a result the image is formed
Remedy :
Use of concave lens of suitable focal length in front of the eye can focus
Long Sightedness (Hypermetropia)
Defect :
Cause :
The eye ball is less converging or too short, thus the rays are focused
Remedy:
A convex lens of suitable focal length is used to bring the image at retine.
Astigmatism :
Defect:
Cause:
The cornea is not perfectly spherical the eye has different focal pionts.
Remedy:
It is corrected by asymmetrical lenses with different raddi of curvature,
Presbyopia:
Defects:
A vision defect in which accomodation power is gradually lost.
Cause :
It is due to age.The lens loses its elasticity and ability to change its shape
Remedy:
Mainly this defect can be corrected by convex lens.But to see distant objects
Parts of Human Eye :
The eye ball is spherical in shape with a diameter of about 2.5cm.It consists of the
following parts:
1.Sclera:
It is the outer most layer of eye.It is thick and opaque and impermeable
to light.
Cornea:
It is the front part of sclera.It is transparent and allows the light
to enter the eye.
Choroid:
It is the pigmented middle layer of eye.It forms a colored curtain
in front of the lens.
Iris
It is the colored curtain which is muscular and acts for varying the diameter
of central pupil.
Pupil
The central hole or aperture of the iris is called pupil.it automatically
controls the amount of light entering the eye.By this, eye is protected from
too bright light.
Convex lens
Behind the iris is a convex lens which is transparent and flexible.its focal
length can be changed by the pressure of ring shaped siliary muscles surrounding
it.It focuses and converges the rays of light entering the eye.
Ciliary Muscles :
They control the lens in its adjustments for seeing a far off ora near byobject.
Retina : It is the third layer inside.The choroid.The rays of light form
and object are focused and converged by the lens on retina.
Optical Nerves
They carry impression to the brain.
Aqueous Humour
It is a transparent water like liquid between cornea and lens.It acts as
refracting component.The shape of eye is maintained by it.
Vitreous Humour
It is a transparent jlly like liquid filled between lens and retina.
Defects Of Eye :
Following are the main defects of eye :
Short sightedness (Myopia)
Long sightedness (Hypermetropia)
Astigmatism
Presbyopia
Short Sightedness (Myopia)
Defects :
If a persons cannot see distance object but can see near objects then he
is suffering from short sightedness.
Cause :
The eyeball is too converging or too long as a result the image is formed
in front of retina and cannot be seen vlearly.
Remedy :
Use of concave lens of suitable focal length in front of the eye can focus
the image clearly on the retina.
Long Sightedness (Hypermetropia)
Defect :
If a person see near objects but can see distant object then he is suffering
from long sightedness.
Cause :
The eye ball is less converging or too short, thus the rays are focused
behind the retina.
Remedy:
A convex lens of suitable focal length is used to bring the image at retine.
Astigmatism :
Defect:
It is a vision defect in which object is not seen clearly because it is
not focused clearly on etine.
Cause:
The cornea is not perfectly spherical the eye has different focal pionts.
Remedy:
It is corrected by asymmetrical lenses with different raddi of curvature,
that is cylinderical lenses.
Presbyopia:
Defects:
A vision defect in which accomodation power is gradually lost.
Cause :
It is due to age.The lens loses its elasticity and ability to change its shape
and the ciliary muscles weaken, resulting in lack of accomodation.
Remedy:
Mainly this defect can be corrected by convex lens.But to see distant objects
one needs concave lens, therefore bi-focal lenses is normally used; i.e.
convex part in the lower portion to see near objects and concave part in the
upper portion to see distant objects.
Tips And Tricks
Portrait Editing :-
Tips And Tricks To Edit Portrait PicturesEveryone Want To Edit Pictures Like A Pro ! People Think Easier
Said That But i Think It Is Too Easy To Edit On Photoshop.When Your Editing
Portrait Picture Don't Invert Don't Make That Picture Look Over Don't Use
That Brush Tool With Trembling Hands Which So Not So Good For Editing.Use
Some Tools Like I Have Shown You Downward.Let Us Enjoy Ourselves With Photoshop.
First Step:-
Open Your Photoshop Whatever Version You Have I Have 7.0 So Pickup
That Picture Whom You Want To Edit.I Got This Picture For Editing.
So What I'm Seeing In This Image.The Girl Have A Lot Wrinkle.
Pickup The Clone Brush And Play With That Like Me.
 Second Step :-

Use Curves Open RGB Then Pickup That Line And Touch To The Second
Last Right side Bottom.Then Pickup Paint Brush use black background and white
foreground on curves layer opacity up to 85% brush on her face, now change
opacity to 20% brush on her hair's like i have done.

Now You Will The Picture Like This.
Third Step :-
Third step you gonna do is select background layer go on filter
select liquify the first tool the use it on her face make her eye
beautiful make eye small whatever you want to do just make eye beautiful
then do that on her lips make lips small like me then small her nose
which is already not so good thats why focus on her nose.Checkout mine

Step Four :-
Now Edit her eyes select eyes goto change color play with her eye
i just color it blue which look pretty good on her face do whatever you want to
do try for best endeavors on day you will become a nice editor.
Step Five:-
Now change the levels of your picture second thing you will do is
change brightness up to -6 and contrast up to +6.
Step Six:-
Now Give Finishing To Your picture goto curves select R,G and B
Play With That Like I Have Done That What Curves Do It Change The Color Of Your
Picture Which Look Totally Different.
Thanks For Reading Keep Sharing And Reading My Blog Stay
Tunned\Blessed.

How To Take Photo On Low Light
How To Take Photos In Low Light :-
External Flash
1.When You Are Taking Picture Of People Or Objects.
2.Consider Using a Diffuser To Lesson The Harsh Shadow.
DSLR
1.Camera With Manual Controls
2.High ISO
3.Burst Shooting Capabilities
4.Ability To Shoot In Raw
LENS
1.Perferably With An Aperture Below f\2.8
2.Look For One With Image Stabilization Or Vibration Reduction.
Remote Shutter Release
1.You Can Shake The Camera When You Press The Shutter Release A Remote Should
Help To Eliminate That Shake.
Tripod
1.To Steady Your Camera And Reduce Shake.
2.Essential For Long Exposures.
How To Guide :-
Put your camera in aperture priority
mode this will ensure that you control all available options.
Crank up ISO
This my result in a image with
additional noise, but this can
be fixed with some post-processing
(shoot in RAW if available)
Use A Large Aperture
Large Apertures Let more Light
Slow Down Shutter Speed
The longer your shutter is open the more light that will get in.
Use An Off Camera Flash
Try to direct the light so that it doesn't hit your subject straight on
try deflection the light to soften it.
Use your cameras exposure compensation Capability
The scale on many of today's dslr's allow from -3 to +3 stops in 1/3 stop increments
Dial the exposure compensation to the positive side to purposefully
''overexpose'' the photograph
Setting Up Your Camera :-
 |
| Setting Up Your Camera |
What is ISO: How sensitive the camera sensor is to light.
What is shutter speed(Exposure): How long your shutter is
open,allowing light to reach the sensor.
What is Aperture: The diameter of the lens opening, which
controls how much light gets to the sensor.

Quick Tips :-
Shine A Light on your subject and auto focus on that,then turn your
light and auto focus off and take the picture.
Do Not Be Afraid to turn up your iso crank it up as high as you
need do not worry about the noise get shot.
When Using Flash bounce the light off a wall or other object will help
to reduce harsh shadow on your subject.
Motion Blur can be a cool effect experiment with a moving subject and
longer exposure time.
If your camera or lens has image stabilization make sure its on.
Do Not Be Afraid to make a mistake you can learn a lot from a mistake
Hand-Held Shots should be no slower then 1/60th of a second other wise
use a tripod to reduce blur.
Buy a 50mm lens f/1.8
If you aim your camera towards the north star.the stars will appear to spiral.
Light Graffiti And Painting With Light :
*wear dark clothing.
*find a dark location.
*set your camera shutter speed to a long exposure, 20+ seconds or bulb setting.
*set your camera on a tripod.
*press shutter.
*begin painting with your flashlight sparkler or glow stick
*Experiment with aperture iso and shutter speed until you get the look
you are going for.
*check your work and try it again if you are not happy.
100 Photography Tips
100 Tips For Better Portraits
Experiment with focal lengths create an interesting background break the 'rules'
of composition play with eye contact try condid photography play with light
frame within a frame change perspective shoot in black and white have fun.
''Your First 10,000 Photographs Are Your Worst''- Henri Cartier-Bresson
10 Tips To Taking Sharper Photos
Faster shutter speed use a tripod focus accurately use a prime lens clean image
stabilization use your base ISO find your lens sweet spot use the light shoot
in raw
''There Is A Vast Difference Between Taking A Picture And Making A Photography''
Robert Heinecken
10 Embarrassing Mistakes I Made As A Beginner Photographer
I never used flash
Constantly on the wrong focus mode
I used the wrong ISO
Always shot in jpg
I didn't know about bulb mode
I never backed up !
I chose the wrong lenses
I transferred over usb straight from the camera
White balance was always off
I used free editing software
''I Find The Single Most Valuable Tool In The Darkroom Is My Trash Can''
John Sexton
10 Reasons Your Photos Suck
Bad lighting
You're making excuses
Wrong white balance
Motion blur
Poor depth of field
Shooting at the wrong time
Distractions
You're trying to impress others
poor composition
too much photoshop!
''Anything More Than 500 Yards From The Car Just Isn't Photogenic''
Edward Weston
10 Photography Cliches You Should Avoid To Improve Your Photography
Flowers,Pets & Sunsets
Fake Lens Flare
Vintage Iphone Apps
Unnecessary Black & White
Selective Color
Dodgy Borders And Garish
Watermarks
Over-saturated HDR
The 'Dutch Tilt'
Heavy Vignetting
Writing On Photos
''There Will Be Fine Times When You Will Be In The Field Without A Camera.
And,You Will See The Glorious Sunset Or The Most Beautiful Scene That
You Have Ever Witnessed.Don't Be Bitter Because You Can't Record It.Sit
Down Drink It In And Enjoy It For What It Is'' DeGriff
''The sheer ease with which we can produce a superficial image often leads
to creative disaster''Ansel Adams
10 Steps To Taking Better Photos
Learn Manual Mode
Lean Basic Composition
Techniques, & then forget them!
Non on camera flash
Get a fresh perspective
Get closer
Clean up your background
Frame your subject
Get your white balance right!
Use the histogram
Practice,practice,practice!
''If you are out there shooting things will happen for you.if you're
not out there you'll only hear about it.'' Jay Maise!
10 Tips For Taking Better Candid Photos
Lose The Flash
Carry your camera everywhere
Be patient
Use a telephoto lens
Add context
Shoot from the hip
Keep quiet and blend in
catch people in the moment
Move around your subjects
shoot in brush mode
''It can be a trap of the photographer to think that his or her best pictures
were the ones that were hardest to get.'' Timothy Allen
10 Questions To Critique A Photo
Where is the visual weight?
are there any disracting elements?
Is the exposure/metering correct?
Would it look better through a different focal length?
what is the background doing?
how is the composition and balance?
Does the photo require post production?
Is the color accurate?
Does the depth of field suit the photo?
Is the photo cliche?
''There are no rules for good photographs there are only good photographs
Ansel Adams
10 Reasons Why Being A Photographer Sucks
No fixed income
it's become really competitive
people will rip you off
the pay can suck
too much time away
nasty people
everyone wants something for nothing
expensive technology
can become repetitive
post production sucks!

Things To Capture
Hmmm In this tutorial i wanna tell you about what thing to capture ummm one important thing i
wanna tell you that you need the best asseccories to capture it is totally depend on you wayof your think what you are thinking it is main thing in photography i'll tell you about that
its depend on your mind okay back to topic in this tutorial i'll tell you about nature
photography how to capture images like wallpapers okay you need beautiful leaves tress
something like that okay check these picture i just use macro and change whiteness and
other thing iso up to 800 when you are capturing flowers tree etc see these picture
given blow --->
 |
| Things To Capture |
 |
| Things To Capture |
 |
| Things To Capture |
 |
| Things To Capture |
 |
| Things To Capture |
 |
| Things To Capture |
Solar Power
Solar Power :-
How Much Fuel Does It Takes To Power A Light bulb For A Year?
HOW MUCH ENERGY-WHETHER ELECTRIC,COAL,NUCLEAR, OR OTHERWISE-IS REQUIRED FOR A 100-WATT
LIGHTBULB TO RUN A YEAR, 24 HOURS A DAY?
(Kilowatt-hour(kWh)=unit of energy equal to 1.000 watt hours
a 100-watt light uses 0.1 kilowatt-hours worth of energy in
hour how much energy does an electric 100-watt lightbulb use
a year?0.1kW * 8,760hours in a year = 876 kWh)
COAL :- 1.Burning 1ton Of Coal Creates 2,460kWh Of Energy.
2.876kWh/2,460kWh/ton=0.357 tons3.0.357tons = 714 pounds
NUCLEAR :- 1. 1pound of the uranium 235 isotope can produce 10,246,469kWh of energy.
2.876 kWh/10,246,469kWh/pound=8.5*10^-5pounds.
3.Divide this by .35(the average thermal efficiency of uranium 235 is only
35%) =2.4*106^-4 pounds.
4.Divide this by .007(uranium 235 isotope needed for nuclear fission makes up
only .7% of raw uranium) = .035 pounds of natural uranium.
1
NUCLEAR GAS :- 1.1 pound of natural gas can produce 6.12 kWh of energy.
2.876kWh/6.12kWh/pound=143 pounds of natural gas.WIND(1.5MW turbine operating at 25% capacity for 2hrs, 20 min 9sec.)
1. 1.5 megawatt turbine x 365 days x
24 hours x 25% capacity =3,285 mWh=3,285 kWh
2. 876kWh/3,285,000 kWh/year = 2,67x10^-4 years
3. 2.67x10^4 years = hours 20 minutes 9 seconds.
SOLAR
(8 days 18 hrs 14 min 24sec.)on 100 square meters of solar panels1. Assuming a yield between 20-25% (average solar convertion efficiency),
a one sqaure meter solar panel can produce 1 kWh of energy in a day.
2. 100 one square meter panels producing 100kWh would
require 8 days 18 hours 14 minutes and 24 seconds.
HYDROELECTRIC (339 kW turbine operating at 80% efficiency
for 2hrs and 35 min.with 500ft^3 of waterper second falling from 10 ft.)
1. The power of a hydro-electric turbine =(height of dam) x (river flow) x
(efficiency) /11.8 (converts unit of feet and seconds into kilowatts)
2.Assuming:dam height(10 feet) x river flow(500 ft^3 per second)
x (80% efficiency)/11.8=339kW turbine.
3. 876 kWh/339kW= 2hours and 35 minutes
Tactics Of A Brand
STRATEGY\MIND
Yes,your brand needs a plan.Not just any plan,
but a strategic plan.Brands that recognize
market trends and respond to consumer activity
get ahead.Your brand must evolve gradually
and strategically over time.
REPUTATION MANAGEMENT\EARS
It's not all that hard to build up a reputation:it's
much more difficult to maintain it.Active listening
in the right place is the key to understand what
people think of your brand-of what's being said
about you when you're not in room.
COMMUNICATION\VOICE
A strong brand delivers a consistent message
with its unique tone of voice.Your voice
should be congruent with the brand's core
values,positioning,and personality.
IMAGE\CLOTHES
Dran right your brand has to look
good, no matter if it wears an ARMANI
suit or a turtle-neck and jeans.It has to
look professional,be consistent,and
make a great impression on people.
POSITIONING\FEET
Where does your brand stand?Is it place
where nobody else is standing?Finding your
unique spot in the market is the fundamental
foundation of your brand.
FRESHNESS\CAP
Are you a brand or a brand?publishing
up-to-date and relevant content keeps
things fresh the public eye.
VISION\EYES
You always have to know where your brand is
headed.Having a strategic and realistic vision
keeps you on track as you move forward.
ANALYSIS\NOSE
Sniff out what your competition is doing
and who the newcomers are.Be in the know
at all times so you can stay in the game.
TRUST\SMILE
A fake smile can be seen a mile away.
Honesty and transparency show the world
that you're genuine and trustworthy.
REACH\ARMS
How far does your brand reach?It pays
to build up a credible presence both
online and offline.Be everywhere your
customers are looking.
CREATIVITY\HANDS
Creativity can make a remarkable
brand, one that stands out from the
rest and wows people.An innovative
brands has a competitive advantage.
How to get Belly Fit
Secrets Of Fitness :-
Keeping Fit (workplace workouts for savvy marketers)
Strength :- Your Strength Is In Your Professional Network.Build Your Connection
Through Linkedin
Flexibility :- Be Flexible.Be Open To Feedback And Criticism From Social Media.
Respond With Grace.
Endurance :- Build Your Online Personal Brand.Manage Your Online Reputation.Boost
Your Endurance And Stay In The Game Longer.
Power :- Build Your Power With Domain Knowledge.Listen To Webcasts,Read E books And
Other Content To Stay On Top Of The Latest Concepts And Tactics.This Is A Heavy
Duty Workout For Your Brain.
Balance :- Strike A Balance Between All Your Activities,Be It A Blog Or Twitter.
Balance Your Time And Effort Sensibly.
Stamina :- You Need Plenty Of Stamina To Keep A Blog Going.If You Stick It Out,
The Rewards Are Sweet.
Agile :- Be Agile.Keep Pace With Your Dynamic,Fast Changing Environment With Google
Alerts.
Speed :- Think Speed,Think Twitter.This 140 Character,Bite-Sized,High-Intensity
Workout Is Sure To Keep You On Your Toes.
Co-ordination :- Take Advantage Of The Latest Technology And Tools To Better Co-ordination
With Your Team.Smartphones,Instant Messengers,Video Conferencing - Use Whatever
Works To Stay On Top Of Your Work.
Accuracy :- Be Accurate.Be Objective.Let The Numbers Speak.
How To Make Bokeh Full Tutorial
How To Make Bokeh Full Tutorial :-
Many people ask me how to create bokeh in thistutorial i would like to tell you something about digital bokeh.First of all i want to
clear the concepts of people that they all want a better and nice camera like
Canon D500 , Nikon D7000 etc.You don't really need a expensive camera's if you
have the digital camera or semi pro etc then its okay what you have in your
camera is ISO up to above 3200,shooter speed you i'll need for a better picture,
colors and result this is a basic need.Second thing depends on you the way
you are capturing picture if you are capturing portrait picture then the view
you i'll need is you gonna do is to focus on the nose if you are just capturing
the face of your model.If You are capturing pictures like head to stomach
then you gonna focus on chest.This is the simple and better tips and tricks
of photography.Now i'm going back to my topic The Digital Bokeh.
Bokeh :-
How to make bokeh it is simpler and quite difficult but gives you output toogood.First of all you gonna do is change your camera setting.
Camera Settings :-
Mood = Auto
ISO = 3200
Flash light = Off
PLEASE TURN ON THE OPTION MACRO (for close-up shoots)
Now what you do is for day light you can find some tress where light is coming
then focus on anything your finger whatever you have then behind what you see is bokeh
the light coming from the trees is change into bokeh it can be do in anything car light etc.
Same principle you gonna do in night but if you turned your mood on night mood its too good.
then focus on anything your finger whatever you have then behind what you see is bokeh
the light coming from the trees is change into bokeh it can be do in anything car light etc.
Same principle you gonna do in night but if you turned your mood on night mood its too good.
What Focus Do ?
Its a big topic which will help you to capture better images.Its really to
good but it is difficult so i'm going to explain you.
good but it is difficult so i'm going to explain you.
What is Princial Focus ?
The rays of light parallel to the principal axis after passingthrough a lens converge at a point in case of a convex lens and appear to diverge from
a point in case of a concave lens.This point is called Focal point or Principal Focus.
What Focus Do?
I told you something like that to focus on your finger when you arecapturing bokeh so focus is the thing which do is to extend the bokeh some expamles i
have ok i'm sharing my art with you guys do comments if you have anyproblem and if you like
my art the way i'm capturing.Thankyou for reading my article stay tunned.
Examples :-
 |
| Focus and zoom is the best thing. |
 |
| Bokeh |
 |
| How To Make Bokeh At Night |


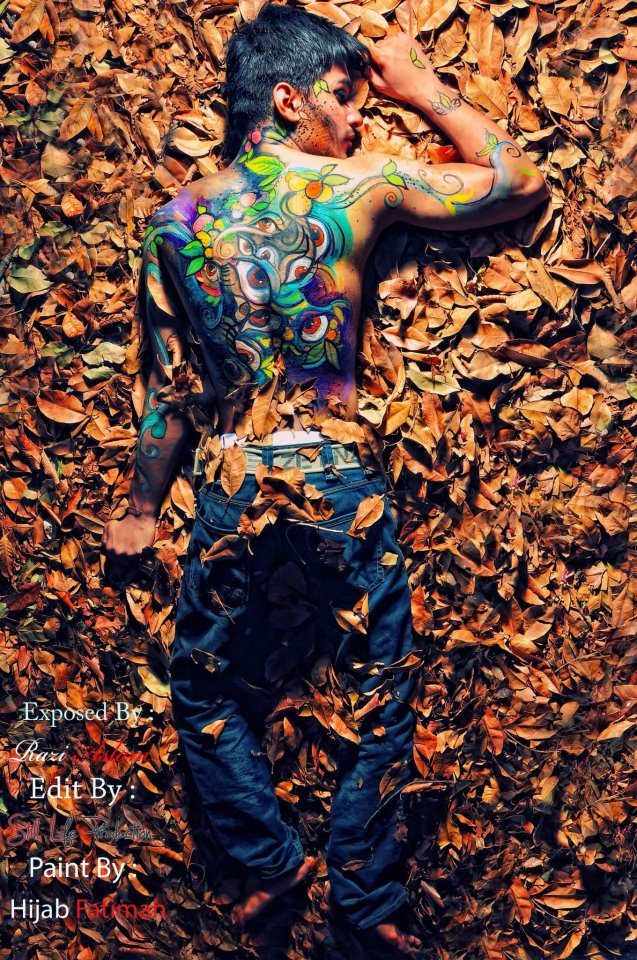
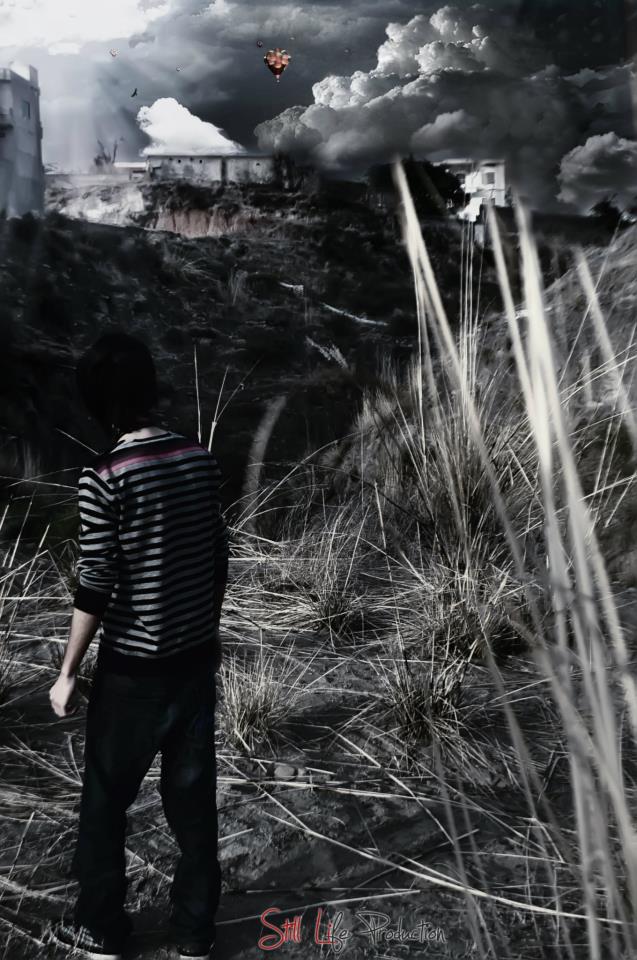
A Cool Way To Improve Photography,Inspiration
Still Life Production
Exposed By : Razi Aslam
Edit By : Still life production
Paint By : Hijab Fatimah..
Pakistani Male Models Wallpapers
 |
| Painted Photography |
 |
| Painted Photography |
 |
| Painted Photography By Razi Aslam |
 |
| Photography By Razi Aslam Edit By Still Life Production |
 |
| Team Of Still Life Production And Razi Aslam |
Models Of Still Life Production
Ahmed Ali
 |
| Ahmed Ali |
 |
| Ahmed Ali With Umberlla |
 |
| Ahmed Ali On Grass |

 |
| Ahmed Ali Touching Sky |
 |
| A Cool Way To Improve Photography |
 |
| Improve Photography |
 |
| Check Here |
 |
| Awesome Photography And inspiration For You |
 |
| Cool |
 |
| Breast Photography |
 |
| Glasses |
 |
| Birds And Road Subtain Sibi |
 |
| Ahmed Ali Hands On Face |
Arsalan Abbasi


Saffi Zakir


Still Life Production And Subtain Sibi


 Previous Article