
About Me
Hi Awesome people I thank you, you just do the best thing yes you visit my site if I would there I hug you so tightly.
Well here you are for my intro right ?
But you'll depressed when you listen it.I can't describe my self even through you can't judge I'm just technically awesome.All is I got GOD gifted talent.
Well here you are for my intro right ?
But you'll depressed when you listen it.I can't describe my self even through you can't judge I'm just technically awesome.All is I got GOD gifted talent.
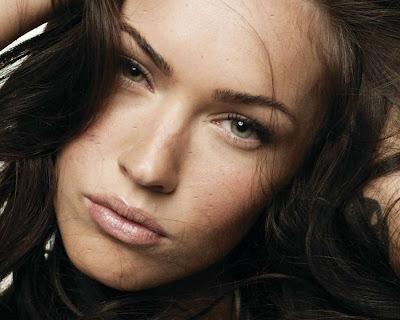
Photography Inspiration
Photographers’ portfolio sites are probably the most simple and plain out of all the genres. While I see very little innovation with respect to “design,” it works and it works well. The photos themselves do all the talking.
Photography is an art, and art needs passion. With passion, there’s learning. These outstanding Photographers are able to “wow!” us because they learn photography by heart. They have passion for the art and through learning they combine all the elements to a degree of perfection!
So much of today advertising is missing the conceptual element. It’s all so dry and straightforward, void of spirit, soul, and sex appeal.
But I think we’re quickly headed back toward conceptual advertising – photography with an inherent friction and message, with a headline that adds a surprise third element. It’s an easy way to shine through the dull and go past the dim.
Concepts behind photographs always amazes me. I’m a commercial photographer this makes me smile to see you post this.
 |
| Girl Wear Sun glasses |
 |
| Awesome Eyes |
 |
| Angel Girl |
 |
| Beautiful Baby |
 |
| Land Scape |
 |
| Socialite Boy |
 |
| Boys Eyes |
 |
| In Desert |
 |
| Kurta Shalwar Concept |
 |
| Hairs And Coat |
 |
| New Hair Style |
 |
| Stylish Kid |
 |
| New Design Of Sun Glasses |
 |
| Portrait Photography |
 |
| Land Scape Mode |
 |
| Beautiful Girl |
 |
| Car |
 |
| Cute Kids |
Portrait Expert Skills Use In Portrait Editing
Do You Find Difference Between These Two Picture Who Looks Better After Or Before Obviously After looks better then before.
What I Do In It:-
First of all i just change the picture quality using HDR action i download this action from google
then i use that beautiful action then i increase levels of picture which make her eye and skin beautiful
then i do some changes with curves i increase the redness and greeness of this picture then i found the embodiment of beauty in it but it still to good what i want then change brightness and contrast of the picture then by doing some change in her nose and make her small with liqufiy tool then change her eye color and lips color using brush tool then you will see real embodiment i call that magnificent.
Justify yourself:
Every point, color, lips and eyes, hairs, even every then i this picture should have a reason to be in your piece; if it doesn’t, strike it. Be harsh if a picture or phrase does not add value to your editing, get rid of it.
You could improve your editing by being more focused about photoshop.There is not much brain squeezing needed for as long as you are in the right mindset to edit.If you have a lot of problems going on in your life and everything seems bothering for you, it would be difficult for you to be inspired and edit down wonderful things. That is why when you decide to edit you have to neglect first relationship problems in real life.
I do a lot of freelance editing and have to say that 9 times out of 10 editor turn in too much v. too little. It's gotten to the point where I'm tempted to offer some kind of portrait editing for how much they should allot for each story section, i.e., for a 1,000-editing feature 200 to 250 for the lead, intro and nut graph; 500 to 600 for the body of the story in which they could spend a paragraph or two on each relevant point or example; and the remaining 100 to 150 edits for a conclusion. Harsh as that kind of outline sounds, it would definitely help some editors who left to their own devices would take 400 to 500 editing on a set up and then have no room left for the details that really make the story.
The only other admonition I'd add to our list is: Use quotes sparingly. If the editor can summarize what a source said in far fewer words they should, and save direct quotes for absolutely positively necessary or the really, really good stuff.
Suggestion :-
For better editing I would suggest to use simple brushes color effects with a lot of action, curves and doing changes in eyes.You must touch the soul of others and his/her curiosity. After that they're all yours.
 |
| Portrait Expert Skills Use In Portrait Editing |
 |
| Before Portrait Editing |

After Portrait Editing Skills
Best portrait Editing Tips And Tricks
 |
| Unedit Picture |
Do Some Change In This Picture Like Use Clone Stamp To Remove Some Spots On Her Face.
Then An Important Thing You Gonna Do In This Picture Is To Make It Bright Lil Bit Contrast Also Then Go to Levels Improve Level Of This Picture Then Make Her face Soft Improve The Levels Of Her Eyes Make Her Beautiful Baby Girl Now The Editing Is Finish.
I got this picture by doing some change in it.Enjoy :D
 |
| How To Edit Portraits Pictures |
Image Formation
Image Formation By A Plane Mirror:
The formation of image by a plane mirror is due to the fact that says traveling
from on object to our eye change their direction after reflection so that they
appear to come from point other than those from which they really started.
Explanation:
Suppose light rays coming from luminous object 'o' are reflected by the plane mirror 'M' and
enter our eye.The line which joins the image 'I' and the object 'o' makes an angle
of 90' with the surface of the mirror 'M' from the geometrical construction, the
distance 'OM'and 'IM' are equal, therefore we feel that the light rays come from 'I'
but in fact they come from 'o' and are reflected by the mirror.At the mirror surface,
we find that the angle of incidence is equal to the angle of reflection.
Characteristics Of The Images Formed By A Plane Mirror:
Images are laterally inverted (Right side appear as left).
Images are of same size as the object.
Images are virtual (Can't be obtained on a screen).
Useful Things
How To Choose Lens
A lens is a piece of transparent material that refracts light in regular
way.It is bounded by one or two spherical surfaces.There are two main types of
spherical lens.
1. Convex lens
2. Concave lens
Convex Lens
A lens which is thick at the center and thin at the edges is called
a convex lens.It converges parallel beam of light at a point and hence is also
called a converging lens.
There are three types of convex lens :
Double Convex Lens :-
Both The Surfaces of this lens are convex.Plano-Convex Lens :-
One of the two surfaces of this lens is plane and other is
convex.
Concave-Convex Lens :-
One of the two surfaces of this lens is concave andother is convex.
Concave Lens
A lens which is thinner at the center and thicker at the edges is
called a concave lens.It diverges a parallel beam of light, hence it is also
called A Diverging lens.
There Are Three Types Of Concave Lens :
Double Concave lens
Both the surfaces of this lens are concave.Plano-Concave lens
One of the two surface of this lens is plane and other isconcave.
Convex concave lens
On of the two surfaces of this lens is convex andthe other is concave.
Now You Are Able To Select lens !
Now People Ask Me What Is Aperture Okay
Actually Aperture Is the Diameter of lens is called aperture of lens.
Optical Center :
The Geometric Center Of A Lens Is Called The Optical Center.
Power Of A Lens :-
The Reciprocal of focal length of a lens is called power of alens.The positive and that of concave lens is supposed to be negative.
Difference Between Compound Microscope And Simple Microscope
Compound Microscope :
Introduction
It is an optical instrument by which a small object can be seen verymuch magnified.
Construction :
It consists of two convex lenses fitted at ends of two tubes.One
of these two tube can move into the other to change the distance between the
lenses.The lens near the object has short focal length and it is called objective,
whereas; the lens near the eye has large focal length and it is called eye piece.
There is a mirror at the base which reflects light on object.
Working
1.The Object Is Placed Between 2f and f of the objective lens.
2.The objective lens produce a real inverted and magnified image beyond 2f.
3.This image comes within the focal length of the eye piece.
4.The eye piece acts as magnifying glass, producing a very enlarge image
which is virtual.
Simple Microscope :
A simple microscope (magnifying glass) is simply a single
biconvex (converging lens of a short focal length.
The object to be seen as magnified is placed within the focal length of the lens.
This produces an enlarged, virtual and erect image towards the object itself.
Magnification Of Simple Microscope :
The magnification of a simple microscope is determine by;
M=1+ d/f
Where 'f' is the focal length of the lens and 'd' is te near point distance
of the object which is about 25cm for the normal eye.
Human eye
Human eye is an organ of visual perception in human being.
Parts of Human Eye :
The eye ball is spherical in shape with a diameter of about 2.5cm.It consists of the
1.Sclera:
It is the outer most layer of eye.It is thick and opaque and impermeable
Cornea:
It is the front part of sclera.It is transparent and allows the light
Choroid:
It is the pigmented middle layer of eye.It forms a colored curtain
Iris
It is the colored curtain which is muscular and acts for varying the diameter
Pupil
The central hole or aperture of the iris is called pupil.it automatically
Convex lens
Ciliary Muscles :
Retina : It is the third layer inside.The choroid.The rays of light form
and object are focused and converged by the lens on retina.
Optical Nerves
They carry impression to the brain.
Aqueous Humour
Vitreous Humour
It is a transparent jlly like liquid filled between lens and retina.
Defects Of Eye :
Following are the main defects of eye :
Short Sightedness (Myopia)
Defects :
If a persons cannot see distance object but can see near objects then he
Cause :
The eyeball is too converging or too long as a result the image is formed
Remedy :
Use of concave lens of suitable focal length in front of the eye can focus
Long Sightedness (Hypermetropia)
Defect :
Cause :
The eye ball is less converging or too short, thus the rays are focused
Remedy:
A convex lens of suitable focal length is used to bring the image at retine.
Astigmatism :
Defect:
Cause:
The cornea is not perfectly spherical the eye has different focal pionts.
Remedy:
It is corrected by asymmetrical lenses with different raddi of curvature,
Presbyopia:
Defects:
A vision defect in which accomodation power is gradually lost.
Cause :
It is due to age.The lens loses its elasticity and ability to change its shape
Remedy:
Mainly this defect can be corrected by convex lens.But to see distant objects
Parts of Human Eye :
The eye ball is spherical in shape with a diameter of about 2.5cm.It consists of the
following parts:
1.Sclera:
It is the outer most layer of eye.It is thick and opaque and impermeable
to light.
Cornea:
It is the front part of sclera.It is transparent and allows the light
to enter the eye.
Choroid:
It is the pigmented middle layer of eye.It forms a colored curtain
in front of the lens.
Iris
It is the colored curtain which is muscular and acts for varying the diameter
of central pupil.
Pupil
The central hole or aperture of the iris is called pupil.it automatically
controls the amount of light entering the eye.By this, eye is protected from
too bright light.
Convex lens
Behind the iris is a convex lens which is transparent and flexible.its focal
length can be changed by the pressure of ring shaped siliary muscles surrounding
it.It focuses and converges the rays of light entering the eye.
Ciliary Muscles :
They control the lens in its adjustments for seeing a far off ora near byobject.
Retina : It is the third layer inside.The choroid.The rays of light form
and object are focused and converged by the lens on retina.
Optical Nerves
They carry impression to the brain.
Aqueous Humour
It is a transparent water like liquid between cornea and lens.It acts as
refracting component.The shape of eye is maintained by it.
Vitreous Humour
It is a transparent jlly like liquid filled between lens and retina.
Defects Of Eye :
Following are the main defects of eye :
Short sightedness (Myopia)
Long sightedness (Hypermetropia)
Astigmatism
Presbyopia
Short Sightedness (Myopia)
Defects :
If a persons cannot see distance object but can see near objects then he
is suffering from short sightedness.
Cause :
The eyeball is too converging or too long as a result the image is formed
in front of retina and cannot be seen vlearly.
Remedy :
Use of concave lens of suitable focal length in front of the eye can focus
the image clearly on the retina.
Long Sightedness (Hypermetropia)
Defect :
If a person see near objects but can see distant object then he is suffering
from long sightedness.
Cause :
The eye ball is less converging or too short, thus the rays are focused
behind the retina.
Remedy:
A convex lens of suitable focal length is used to bring the image at retine.
Astigmatism :
Defect:
It is a vision defect in which object is not seen clearly because it is
not focused clearly on etine.
Cause:
The cornea is not perfectly spherical the eye has different focal pionts.
Remedy:
It is corrected by asymmetrical lenses with different raddi of curvature,
that is cylinderical lenses.
Presbyopia:
Defects:
A vision defect in which accomodation power is gradually lost.
Cause :
It is due to age.The lens loses its elasticity and ability to change its shape
and the ciliary muscles weaken, resulting in lack of accomodation.
Remedy:
Mainly this defect can be corrected by convex lens.But to see distant objects
one needs concave lens, therefore bi-focal lenses is normally used; i.e.
convex part in the lower portion to see near objects and concave part in the
upper portion to see distant objects.
Tips And Tricks
Portrait Editing :-
Tips And Tricks To Edit Portrait PicturesEveryone Want To Edit Pictures Like A Pro ! People Think Easier
Said That But i Think It Is Too Easy To Edit On Photoshop.When Your Editing
Portrait Picture Don't Invert Don't Make That Picture Look Over Don't Use
That Brush Tool With Trembling Hands Which So Not So Good For Editing.Use
Some Tools Like I Have Shown You Downward.Let Us Enjoy Ourselves With Photoshop.
First Step:-
Open Your Photoshop Whatever Version You Have I Have 7.0 So Pickup
That Picture Whom You Want To Edit.I Got This Picture For Editing.
So What I'm Seeing In This Image.The Girl Have A Lot Wrinkle.
Pickup The Clone Brush And Play With That Like Me.
 Second Step :-

Use Curves Open RGB Then Pickup That Line And Touch To The Second
Last Right side Bottom.Then Pickup Paint Brush use black background and white
foreground on curves layer opacity up to 85% brush on her face, now change
opacity to 20% brush on her hair's like i have done.

Now You Will The Picture Like This.
Third Step :-
Third step you gonna do is select background layer go on filter
select liquify the first tool the use it on her face make her eye
beautiful make eye small whatever you want to do just make eye beautiful
then do that on her lips make lips small like me then small her nose
which is already not so good thats why focus on her nose.Checkout mine

Step Four :-
Now Edit her eyes select eyes goto change color play with her eye
i just color it blue which look pretty good on her face do whatever you want to
do try for best endeavors on day you will become a nice editor.
Step Five:-
Now change the levels of your picture second thing you will do is
change brightness up to -6 and contrast up to +6.
Step Six:-
Now Give Finishing To Your picture goto curves select R,G and B
Play With That Like I Have Done That What Curves Do It Change The Color Of Your
Picture Which Look Totally Different.
Thanks For Reading Keep Sharing And Reading My Blog Stay
Tunned\Blessed.

How To Take Photo On Low Light
How To Take Photos In Low Light :-
External Flash
1.When You Are Taking Picture Of People Or Objects.
2.Consider Using a Diffuser To Lesson The Harsh Shadow.
DSLR
1.Camera With Manual Controls
2.High ISO
3.Burst Shooting Capabilities
4.Ability To Shoot In Raw
LENS
1.Perferably With An Aperture Below f\2.8
2.Look For One With Image Stabilization Or Vibration Reduction.
Remote Shutter Release
1.You Can Shake The Camera When You Press The Shutter Release A Remote Should
Help To Eliminate That Shake.
Tripod
1.To Steady Your Camera And Reduce Shake.
2.Essential For Long Exposures.
How To Guide :-
Put your camera in aperture priority
mode this will ensure that you control all available options.
Crank up ISO
This my result in a image with
additional noise, but this can
be fixed with some post-processing
(shoot in RAW if available)
Use A Large Aperture
Large Apertures Let more Light
Slow Down Shutter Speed
The longer your shutter is open the more light that will get in.
Use An Off Camera Flash
Try to direct the light so that it doesn't hit your subject straight on
try deflection the light to soften it.
Use your cameras exposure compensation Capability
The scale on many of today's dslr's allow from -3 to +3 stops in 1/3 stop increments
Dial the exposure compensation to the positive side to purposefully
''overexpose'' the photograph
Setting Up Your Camera :-
 |
| Setting Up Your Camera |
What is ISO: How sensitive the camera sensor is to light.
What is shutter speed(Exposure): How long your shutter is
open,allowing light to reach the sensor.
What is Aperture: The diameter of the lens opening, which
controls how much light gets to the sensor.

Quick Tips :-
Shine A Light on your subject and auto focus on that,then turn your
light and auto focus off and take the picture.
Do Not Be Afraid to turn up your iso crank it up as high as you
need do not worry about the noise get shot.
When Using Flash bounce the light off a wall or other object will help
to reduce harsh shadow on your subject.
Motion Blur can be a cool effect experiment with a moving subject and
longer exposure time.
If your camera or lens has image stabilization make sure its on.
Do Not Be Afraid to make a mistake you can learn a lot from a mistake
Hand-Held Shots should be no slower then 1/60th of a second other wise
use a tripod to reduce blur.
Buy a 50mm lens f/1.8
If you aim your camera towards the north star.the stars will appear to spiral.
Light Graffiti And Painting With Light :
*wear dark clothing.
*find a dark location.
*set your camera shutter speed to a long exposure, 20+ seconds or bulb setting.
*set your camera on a tripod.
*press shutter.
*begin painting with your flashlight sparkler or glow stick
*Experiment with aperture iso and shutter speed until you get the look
you are going for.
*check your work and try it again if you are not happy.